rce_model><!--Define the source model from where you'll get data-->
</field>
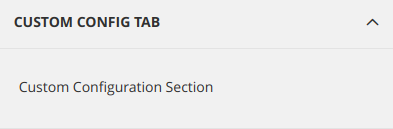
</group>
</section>
</system>
</config>
Souce Model (<source_model>) :- Source model is a model of the data that we can use for configuration. There are many default source model in magento2 that we can use while creating the custom configuration. Here we have used Magento\Config\Model\Config\Source\Yesno source model that create a yes/no drop-down configuration. We can also create our custom source model.
Fetch Configuration Value programmatically
Create a Helper class Configvalue.php inside Vendor/Module/Helper :-
Magento2 CLI Back after a long break! Starting again with this blog because I found it the most important to understand if we are doing the magento development as magento commands play the most important role here. It really helps us a lot if we know that lĺwhich command we need to run on this action or after any changes. Let’s start with the basic commands that we use a lot of times during our development. cache:clean or cache:flush php bin/magento cache:clean Or php bin/magento cache:flush Both of these commands are used to clean the cache of Magento2 so that your new changes can be reflected to your store. Using cache:clean it deletes all the enabled cache of magento2. Disabled caches are not affected with cache:clean but if you are doing cache:flush then it purges all the cache storage of magento wherever its enabled or disabled or it even deletes all the third party cache along with the magento cache. If you are doing any changes in admin...
How EAV Model Works in Magento2? EAV Model stands for Entity-Attribute-Value is a very important concept of magento2 to understand how the attributes of entities are stored and works in magento2. EAV Model is described as :- Entity - Entity refers to the data items such as customers,orders,catalog,category etc. Attribute - Attributes of the entities like price is an attribute of the product(entity) is referred here is an attribute. Value - A value of the attribute as $20 is a value for price attribute is referred here is a value. Use of EAV Model EAV(Entity-Attribute-Value) is used to create new attributes of entities such as products, categories etc. With the use of eav models we don’t need to change the structure of the core tables of attributes thus it increases the scalability of the system. Let’s have a look at how eav works in Magento2 - Eav mode...
Plugins in Magento2 Unlike Magento1, Magento2 introduces a whole new concept of Plugins or Interceptor. A plugin or interceptor is used to change the behaviour of the method of any class without affecting the actual class. This is a very powerful way to customize the core classes of Magento2. Plugins are one of the customization methods in Magento2. In plugins, there is a design pattern called “Interception” which means “Inserting code dynamically without changing original class behaviour” and this is what plugins exactly do in Magento2. Plugins modify the behaviour of a plugin class function by intercepting a function call and adding code before, after and around that function’s call. Plugins are used with public methods only. Declaring Plugins To declare plugins in Magento2, we have to create di.xml according to the specific area. Create di.xml inside Vendor/Module/etc for global. < config > < type name = "{ObservedTy...


Comments
Post a Comment